
It was a typical Tuesday morning in the Xinzirain sample room when a client asked why their ankle boot prototype was delayed by two days.
The answer was sitting on the pattern master’s desk. Our master had noticed that translating the client's 3D sketch into a 2D paper pattern resulted in a shoe collar that was exactly 2 millimeters too tight around the instep. In footwear, a 2mm difference isn't a "slight variance"—it is the difference between a shoe that fits perfectly and a shoe that causes blisters after ten minutes of walking. We stopped production to adjust the pattern.
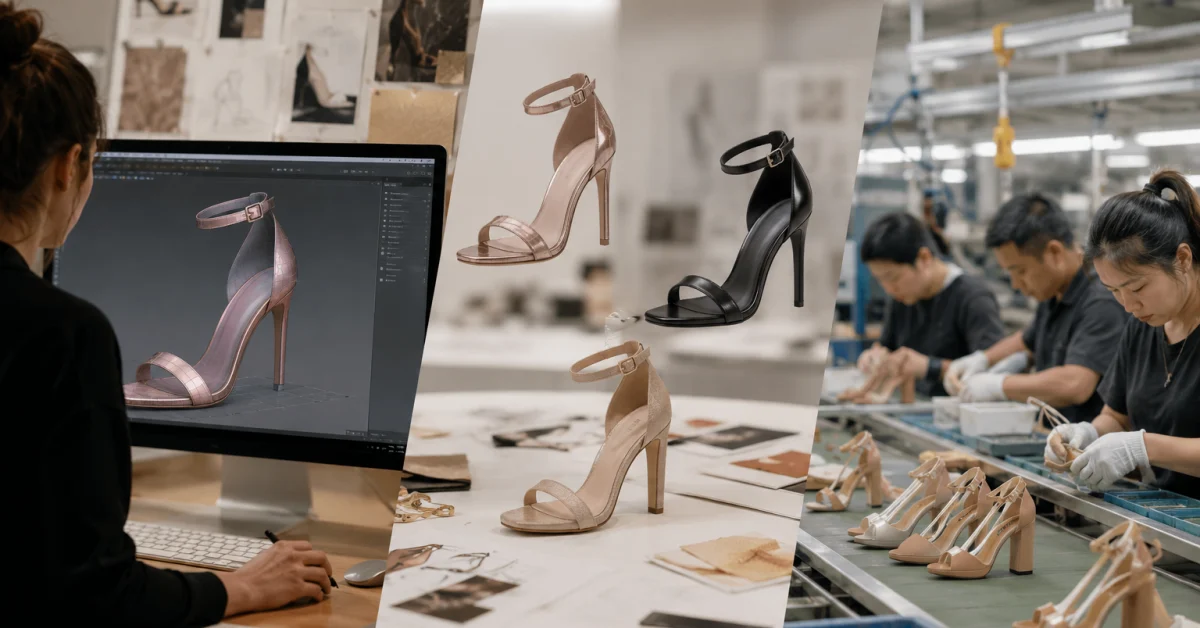
When new brands contact us about custom shoe production, they often assume it’s an automated, push-button operation. You feed a sketch into a machine, and a finished sneaker pops out the other side.
The reality is much louder, messier, and highly physical. The footwear production process involves heavy machinery, chemical primers, industrial ovens, and dozens of pairs of human hands.
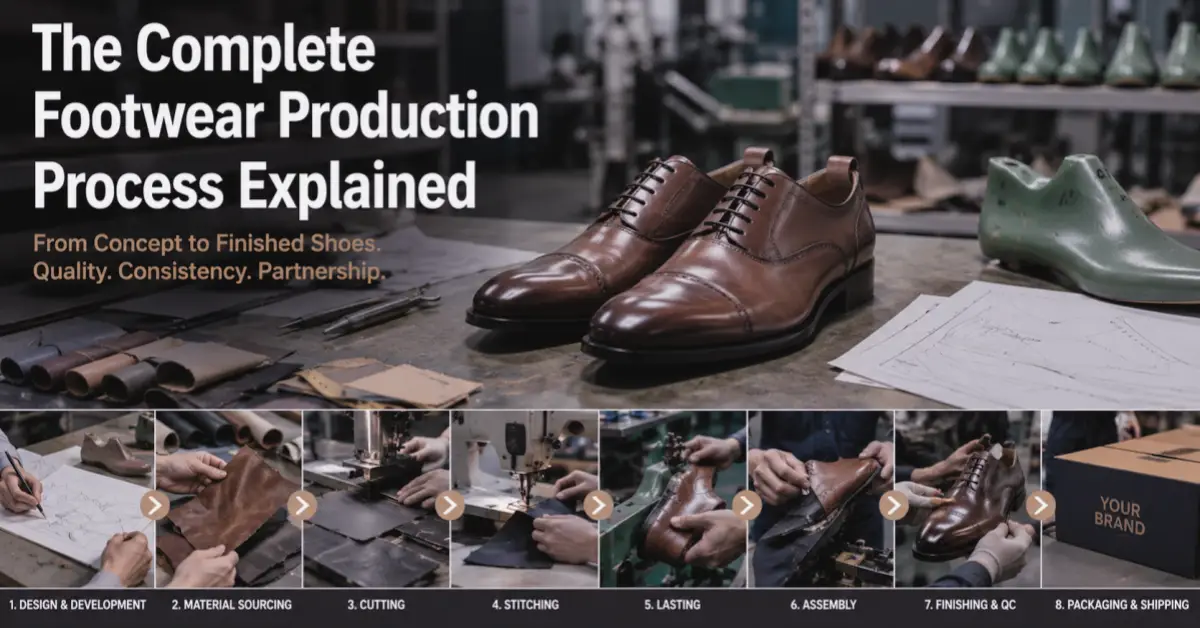
If you are a brand founder or designer preparing to manufacture your first line, here is exactly how shoes are made on our factory floor, step by step, without the marketing fluff.
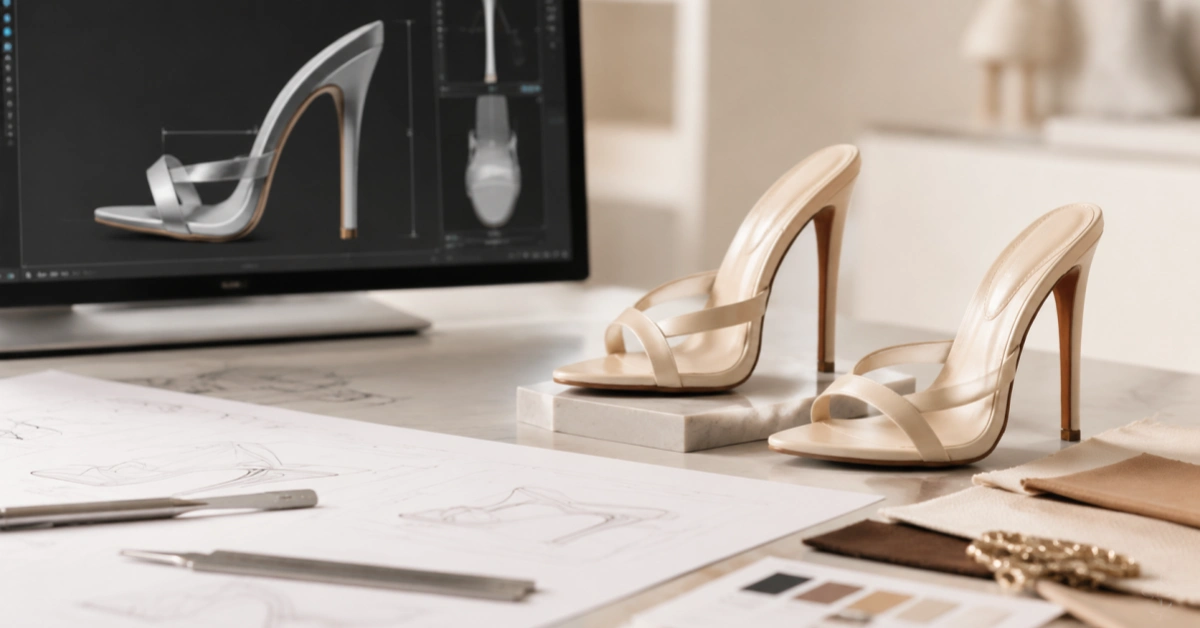
Phase 1: The Tech Pack and The Last
Everything starts in the development office. The biggest bottleneck in the entire shoe manufacturing process rarely happens on the assembly line; it happens right here at the beginning, usually because of an incomplete Tech Pack.
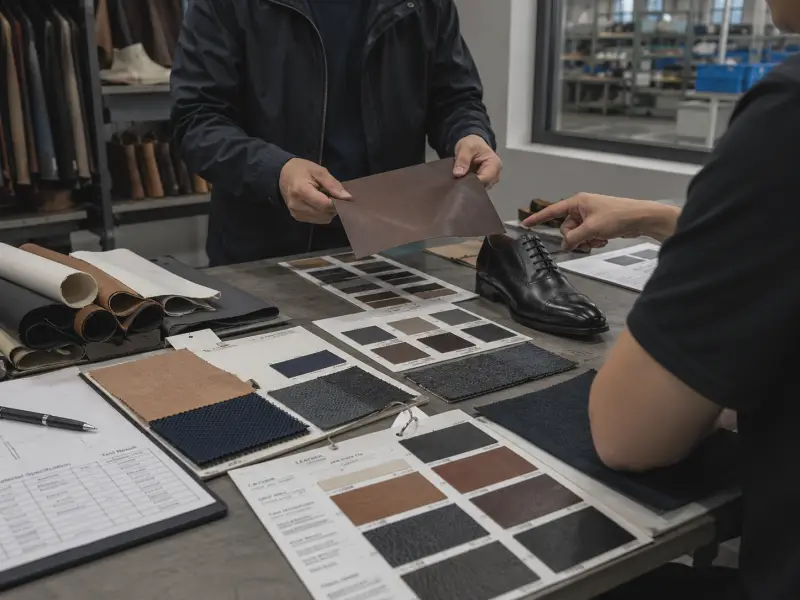
We usually tell clients: a Pinterest mood board is not a Tech Pack. A proper tech pack tells us the exact material of the upper, the thickness of the lining, the pantone color of the stitching, and the specific density of the outsole. If you just write "leather upper," we have to ask you: What kind? Cowhide? Sheepskin? Full-grain? What thickness? Without these details, we spend two weeks just confirming emails before a single piece of material is cut.
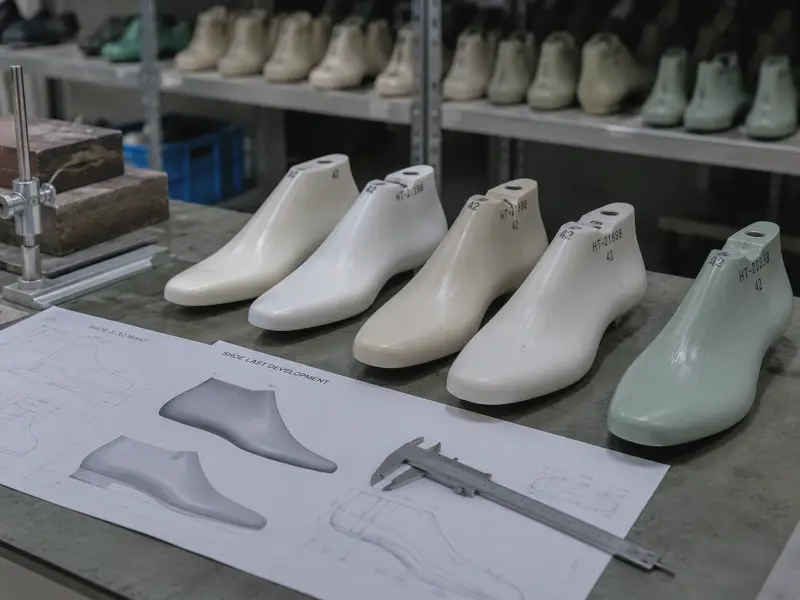
Once the tech pack is locked in, we move to the most critical object in the factory: The Last.
A last is a solid mold (usually high-density plastic) shaped like a human foot. It dictates the entire volume, toe spring, and heel pitch of your shoe. You can have the most beautiful design in the world, but if the last is poorly engineered, the shoe will hurt. We spend a lot of time adjusting the last, shaving off a millimeter here, adding a bit of volume there, until the physical balance is correct.
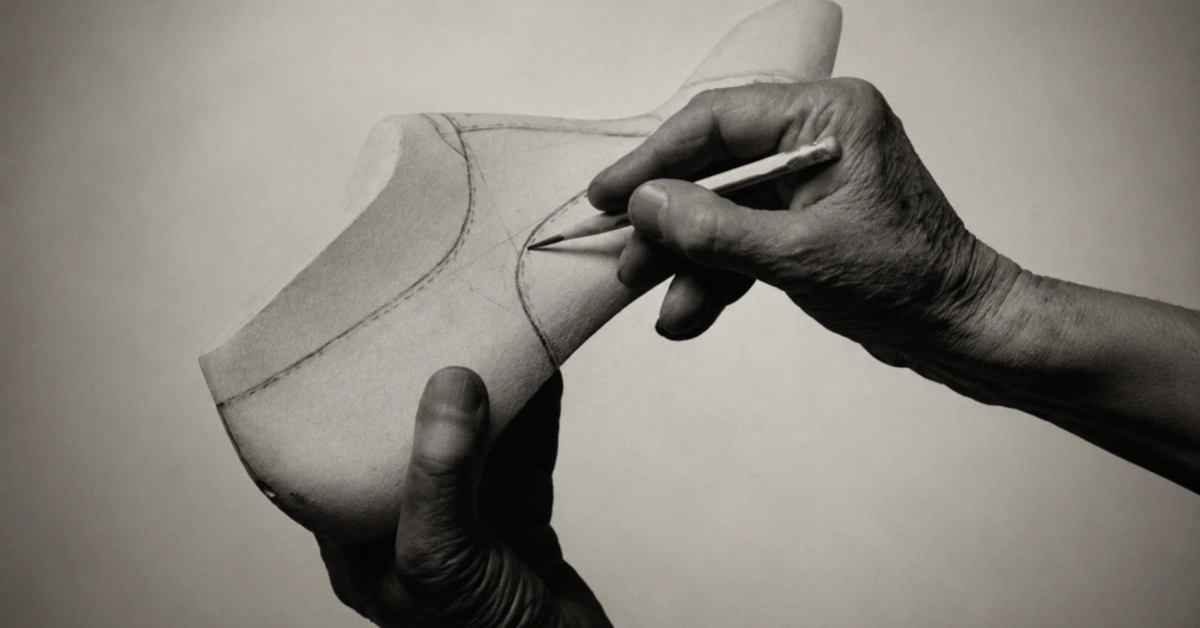
Phase 2: Patterns and The Reality of Materials
With the last finalized, our pattern master wraps it in masking tape, draws the design lines directly onto the tape, and peels it off to lay it flat. This creates the 2D paper patterns.
This is where the reality of material sourcing hits.
Many designers pick materials purely based on look, using small color swatches. But on the factory floor, how a material behaves is just as important as how it looks.
If a client chooses a leather that is too stiff, our workers are going to have a nightmare trying to stretch it over the last later on. If it's too soft, the shoe will collapse like a deflated balloon on the retail shelf. When a material is too soft, we have to intervene by adding hidden reinforcements—thermal toe puffs and stiff heel counters—sandwiched between the outer material and the lining just to hold the shape.
Phase 3: Cutting and Stitching (Closing the Upper)
Once the materials arrive from the tannery or textile mill, they go to the cutting room. We don’t just stamp out shapes blindly. A human cutter (or a computer-guided laser for synthetics) has to examine genuine leather hides for natural scars, bug bites, or stretch marks, positioning the cutting dies to avoid these flaws.
After cutting, the pieces move to the stitching room to become the "upper" (the top part of the shoe).
Before a single needle pierces the material, we do something called "skiving." Leather is thick. If you fold two pieces of thick leather over each other and stitch them, you get a bulky, ugly seam that will rub against the wearer’s foot. Skiving machines shave down the very edges of the leather pieces so they can be folded and stitched flat.
The stitching lines have to be exact. A crooked stitch on a vamp means that piece goes straight into the trash bin. By the end of this phase, the upper looks like a floppy, hollow sock.
Phase 4: Lasting (Brute Force and Heat)
If you walk onto the floor during the lasting phase, you'll feel the heat. This is the most physically demanding part of the footwear production process.
Lasting is the process of pulling that floppy upper tightly over the plastic last to give it its final 3D shape. First, we heat the upper in a conditioning machine to make the leather or synthetic material pliable. Then, a heavy machine with metal pincers grabs the edges of the upper and yanks it down hard over the last, tacking it into place on the bottom of the insole board.
It takes serious physical strength and an experienced eye. If the worker pulls too hard, the material tears. If they don't pull hard enough, the shoe will have ugly wrinkles around the toe box.
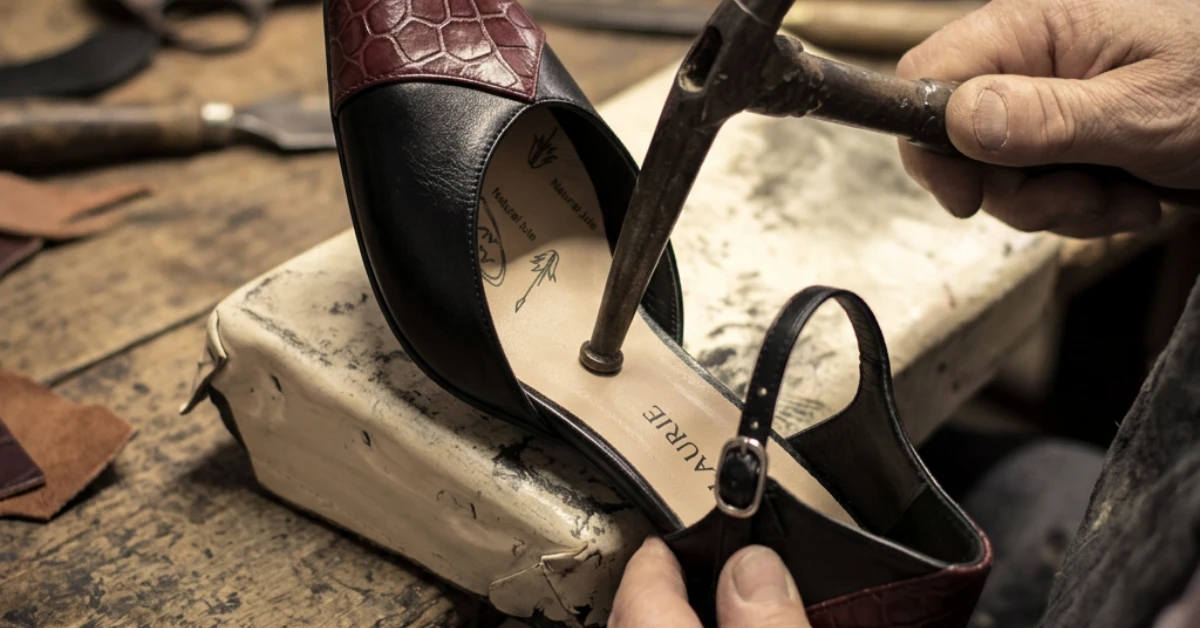
Phase 5: Bottoming (The Chemistry of Sole Attachment)
This is where many new brands get surprised. You cannot just slap some glue onto the bottom of a leather upper and stick a rubber sole to it. It will peel apart within a week.
Attaching the sole is a strict chemical and thermal process:
- Roughing: We take a grinding wheel and "rough up" the exact margin on the bottom of the upper where the sole will attach. This removes the smooth finish of the leather so the glue has a porous surface to bite into.
- Priming: We brush a chemical primer onto both the roughed upper and the outsole.
- Cementing: Industrial shoe cement is applied.
- The Heat Tunnel: Both parts are sent through a heat tunnel to activate the cement.
- Pressing: While still piping hot, the sole is attached to the upper, and the shoe is immediately put into a high-pressure hydraulic press to bond them together permanently.
A major hallmark of a high-quality factory is the "glue line." You want the sole completely bonded to the upper, but you don't want to see a shiny rim of excess glue leaking out of the seams. Our workers carefully clean and inspect these edges.
Phase 6: Factory Floor QC and Packaging
At Xinzirain, Quality Control (QC) isn't just someone looking at a shoe from three feet away and putting it in a box.
Our QC inspectors are highly critical. They run their bare hands completely inside the shoe. Why? Because a stray drop of hardened glue, a sharp thread, or a folded piece of lining will cut the wearer's foot. We catch that before the shoe ever leaves the building.
We also check:
- Symmetry: Are the left and right shoes identical in height?
- Heel alignment: Is the heel attached perfectly straight? A crooked heel will throw off the wearer's posture and break quickly.
- Size margins: Does the finished shoe match the precise measurements of the last?
- Cleanliness: Are there any scuffs, silver pen marks (used for pattern tracing), or loose threads?
Only after it passes this physical exam does the shoe get un-laced, stuffed with tissue paper to hold its shape, wrapped, and boxed for shipping.
The Realities of Shoe Manufacturing
Custom footwear is a heavy industry. It is a mix of old-school craftsmanship and industrial engineering. When we quote a lead time or explain a material limitation to a client, it is because we know exactly what is going to happen when that design hits the cutting room floor.
Understanding this process helps brands make better design decisions, source smarter materials, and ultimately deliver a product that doesn't just look good on Instagram, but survives on the street.
Common Delays in the Shoe Manufacturing Process
Here is a quick look at what actually causes delays on the factory floor, and how we solve them.

Factory FAQ
How long does custom shoe production actually take?
For a brand new design, developing the last, creating the patterns, and making the first physical sample takes about 15 to 25 days. Once you approve the sample, bulk production usually takes 30 to 45 days, depending on material availability and the size of your order.
Why do you need a Tech Pack if I already sent you 3D renderings?
A 3D rendering shows us what the shoe looks like on the outside. A tech pack tells us what is happening on the inside. We need to know exact measurements, material compositions, hardware specs (like zipper types or eyelet metals), and hidden reinforcements.
Can you just reverse-engineer a physical shoe I send you?
Yes. If you send us a shoe that has a fit you love, we can break it down, measure the volume, and recreate a last that mimics that exact fit, while applying your new exterior design to it.
What happens if my selected material is too thick for my design?
If you choose a heavy leather for a delicate, folded design, it won't sit right on the machine. We will either advise you to change the material, or we will use our skiving machines to thin out the specific joints and seams so the design can still be assembled properly.
Start Your Production Run
At Xinzirain, we build shoes for brands that care about the details—from the curve of the last to the cleanliness of the glue line. If you have your tech packs ready, or if you need an experienced factory to help you turn a concept into a physical, wearable prototype, we are ready to get to work.
Contact our project management team today to discuss your next footwear collection.
Author Bio
Author: Xinzirain Footwear Development Team
The Xinzirain Footwear Development Team works closely with international designers, startup footwear brands, and private label clients to turn shoe concepts into production-ready collections. From last development and pattern adjustment to material sourcing, sampling, lasting, outsole bonding, and final quality control, our team brings hands-on factory experience to every stage of custom shoe production.
We write from the factory floor — not from theory — to help brand owners understand how shoes are really made and how to avoid costly production mistakes before they happen.